

Tutorial: Glitching Images Using Audacity
Last week I posted a tutorial on glitching photos and videos using a HEX editor. As promised, this week I’m posting a tutorial on glitching photos using audio in the program Audacity. This process produces much more distorted images than using a HEX editor. Sometimes you might find the images produced are too distorted. To counter this you can change the image’s hue and saturation in Photoshop. To begin, here’s a couple examples of photos I’ve made using this process:


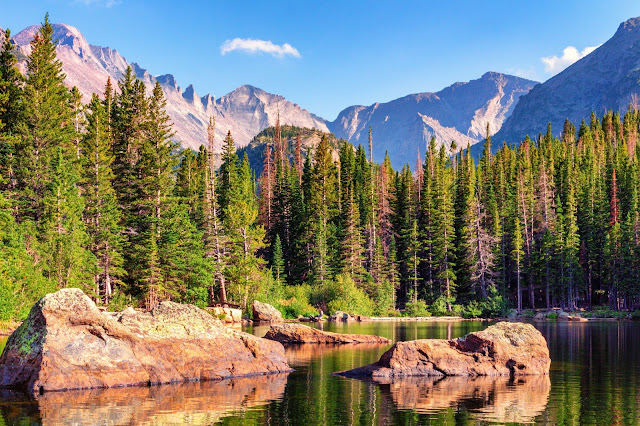
For this tutorial I will be using this image from Brainard Lake, CO.

First, you’ll need Audacity. Audacity is a free program available for Mac, Windows and Linux. It is an audio editing program but for our purposes we aren’t too worried about its audio editing capabilities. To open an image in this audio program you can import it as raw data.

I use a headerless Photoshop RAW file when glitching images in Audacity. If you aren’t sure what that is then check out my previous tutorial to learn how to save an image as a Photoshop RAW file. When importing your image you will come across a dialog box. The settings that I use are Encoding: U-LAW, Byte Order: Little Endian and Channels: 1 Channel (Mono) while leaving the others on their defaults.

Once you open the file in Audacity it will be displayed as an audio wave. Feel free to play the audio of your file but just a warning, it’s not pretty.

One of the easiest ways to glitch an image in Audacity is to apply audio effects from the program to an image.

For example here is our image when the phaser effect is applied to it:

Different audio effects will produce different results so experiment! You can also select sections of your file and apply different effects to each selection. Another thing you can do is copy and paste different sections into different places of your file. Just be sure to cut the selection that you are copying so that you end with the same length of audio as you began with. Here is our image using this technique:

For my process, I combine audio with my images. I will be using the audio from this video in which President Trump says that he does not believe the climate report released by his administration. I used YTMP3 to download an MP3 file of the audio. Now you need to import the audio into Audacity. Only this time you are importing an audio file so you will import it as Audio and not RAW Data.

This is the Audacity workspace after importing the audio with the image:

All that’s left to do is to export the new image. To export the glitched image select Export Audio in Audacity making sure to create a new file name so you don’t overwrite your original image. You will also get a dialog box telling you that your audio will mixed down to one channel; click okay.

Here is the result:

As I said earlier, the image is sometimes too distorted for the result I am looking for. In these situations I will open the image in Photoshop to change the hue and saturation.

Different changes to the hue and saturation will produce different results to your image so once again experiment! Here’s our final result:

Audacity is a free, simple to use tool to create glitched images. This tutorial only scratches the surface. Play around with different techniques and feel free to share the results! You can view my series of glitched images and videos titled The Corrupted Landscape on Instagram (@brandoncranford) or on my website (brandoncranford.com).
Nice information provided by you, it really helped me to understand this topic. I have also referred this article to my friends and they also enjoyed this informative post. Audacity Crack
ReplyDeleteThis comment has been removed by the author.
ReplyDelete